Amazon Simple Storage Service (Amazon S3) is an object storage service that offers industry-leading scalability, data availability, security, and performance. This means customers of all sizes and industries can use it to store and protect any amount of data for a range of use cases, such as websites, mobile applications, backup and restore, archive, enterprise applications, IoT devices, and big data analytics. Amazon S3 provides easy-to-use management features so you can organize your data and configure finely-tuned access controls to meet your specific business, organizational, and compliance requirements. Amazon S3 is designed for 99.999999999% (11 9's) of durability, and stores data for millions of applications for companies all around the world.In this article, I will be deploying a React frontend application to AWS S3.Prerequisites
- An AWS account
Step 1: Creating a bucket on S3Log in to the AWS console and from the services tab, select S3. You should have a page similar to the one below if you have not created an S3 bucket.
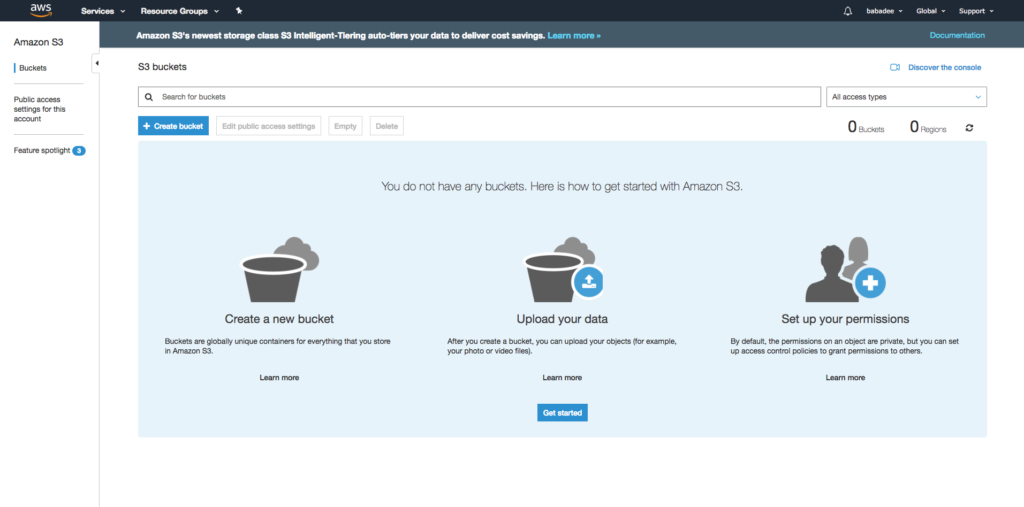
Next click on the create bucket button where we will fill the required details for the bucket. Provide any name of your choice. Kindly note bucket names are unique across AWS users, that means you can’t pick a name that is currently used by any S3 user.

Click on next and leave other settings as default and create the bucket. You will be taken back to the dashboard where the newly created bucket will be visible and accessible.Step 2: Setup User AccessNow we need to set up a user that can access the S3 service from the command line/terminal which is where we will be running the commands to deploy our application.We will do this using AWS Identity and Access Management (IAM) which is accessible from the services dropdown on the AWS console dashboard.

Your IAM dashboard should look similar to this;
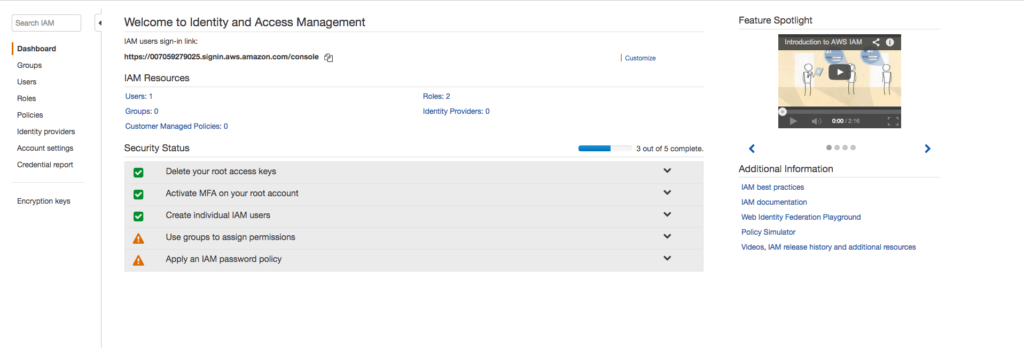
From the left menu pane, select Users then Add user. Input the user name of your choice, check the programmatic access box. Programmatic access simply means the user can use his/her AWS access keys to connect to AWS services using AWS API, CLI (this article intend use case), SDK and other development tools.
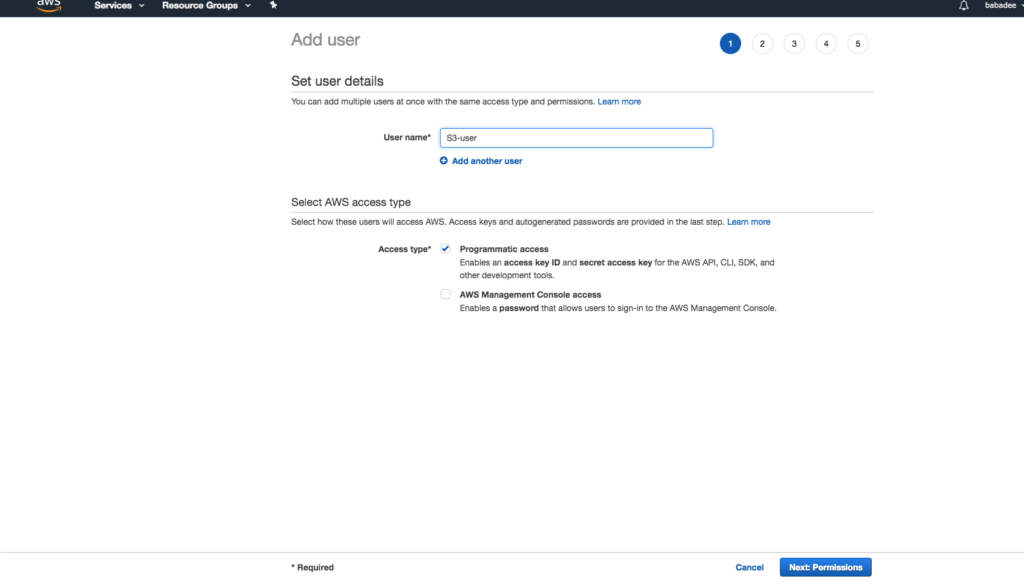
Select next to move to the next configuration window where we will select the level of access this user will be given. We are assigning this user full access to S3 and to do that, click on Attach existing policies directly and search for S3 using the provided search box. We will be selecting the AmazonS3FullAccess from the displayed result.
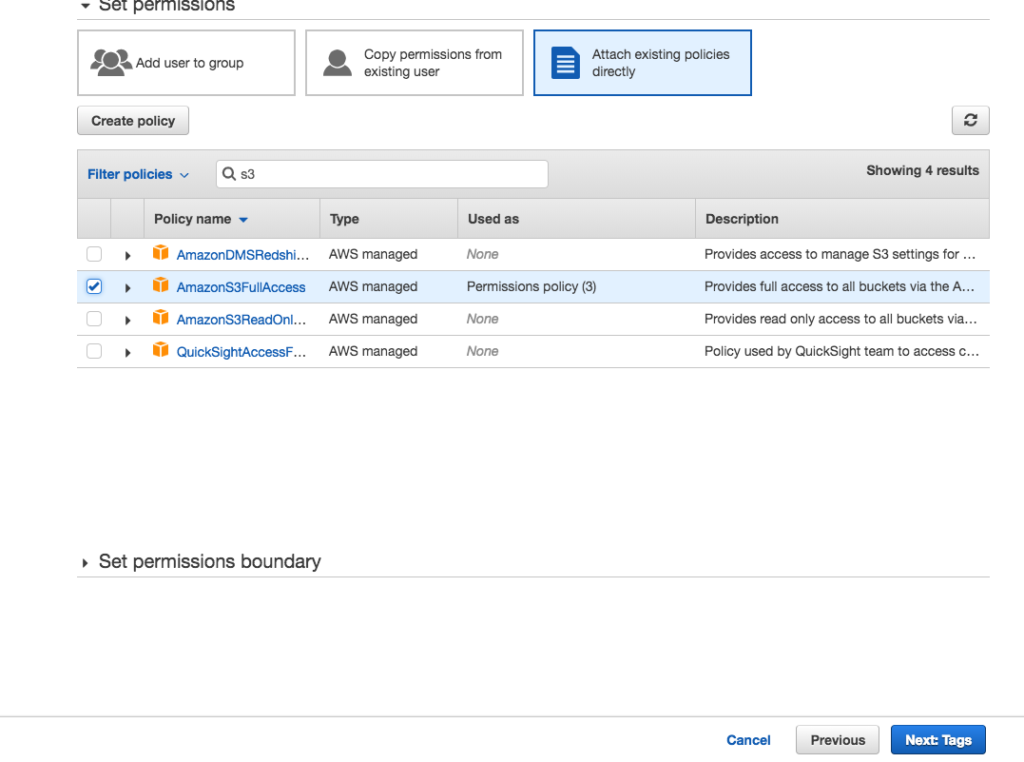
We will leave all other settings as default and create the IAM user. You are required to download a generated credentials for this user then close.Step 3: Configure AWS CLI & Setup Project On Mac, you can use brew to install the AWS CLI by typing the following command;

On your terminal, run the following command to properly set up the AWS credentials on your local system.

This command will create a .aws folder on the local machine and store the credentials in it.You will be prompted to input first, your access key ID then secret access key. These are the keys provided in the .csv file you downloaded in step 2. You can leave the default region and default output format blank.To make sure everything is set up properly, you can run this command;

This should output the list of buckets you have on S3.For this tutorial, I will be using the production build of create-react-app. The same settings apply to any React application. In the project (create-react-app) directory, first, create the production build by running;

Then add the command below to the scripts section in the package.json file, the script is what will be called to deploy the content of the build folder to the S3 bucket specified.This command, using the AWS CLI syncs the build folder with the S3 bucket. Note; change the your-bucket-name in the command to your own bucket name.

Step 4: Configure bucket for web hostingOne of the cool features associated with using AWS S3 is the ability to set up your bucket as a static web hosting platform. In this step, we will need to do just that. Head over to the S3 dashboard and select your bucket.Under the properties tab, select static web hosting and check the use this bucket to host a website box. Fill the index document and error document field as index.html, copy the endpoint on the form to your dashboard and click on save. Take note of the endpoint on the form as this will be the URL with which we access the application from the web browser.

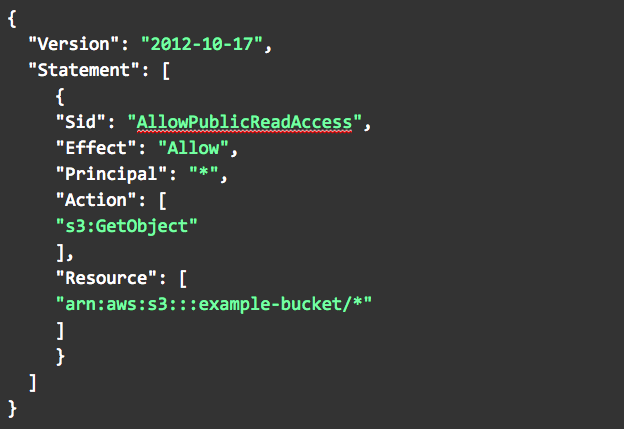
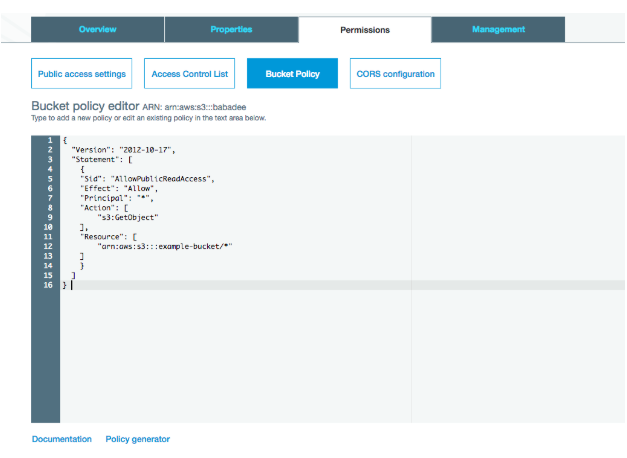
Under the permissions tab, click on the bucket policy. We need to add a policy that allows access to the bucket and in turn the application. Add the policy below, make changes to the Resource by replacing the example-bucket with your bucket name and save.
We are good to go.Head over to the project directory in the terminal, run the script using the command;

This will deploy the React application to AWS S3. Visit the application live using the endpoint.ConclusionAlthough, you can launch your web application on S3 using a serverless architecture (e.g AWS Lambda + API Gateway + DynamoDB) the AWS S3 web hosting feature primarily supports static websites.


.png)


.avif)


.png)


